Are you considering adding window tint to your home or office? Fortunately, installing window tint can be easy with care and patience. Follow this step-by-step guide to learn how to apply window film and transform your windows with a professional-looking finish.
Pre-installation Preparation
Before installing, you must follow a few essential steps to ensure the application goes just right! Keep reading to find out how to get the perfect window film application.
Choose The Right Tint
Commercial window tint is available in various options. You can get everything from a solar window tint that helps block harmful UV rays and provides glare reduction to a security window film that helps prevent damage and theft to a decorative window film with designs and patterns.
So, before window film installation begins, consider what you intend to use it for and select your tint accordingly.
Take Proper Measurements
First, you'll want to measure the windows to determine how much tint you need to purchase. There’s nothing worse than starting a project with too little!
Once you've determined how much you will need and have purchased the tint, measure each window from gasket to gasket. Measuring this way will give you the most accurate results when determining the precise fit to your window.
Thoroughly Clean the Window
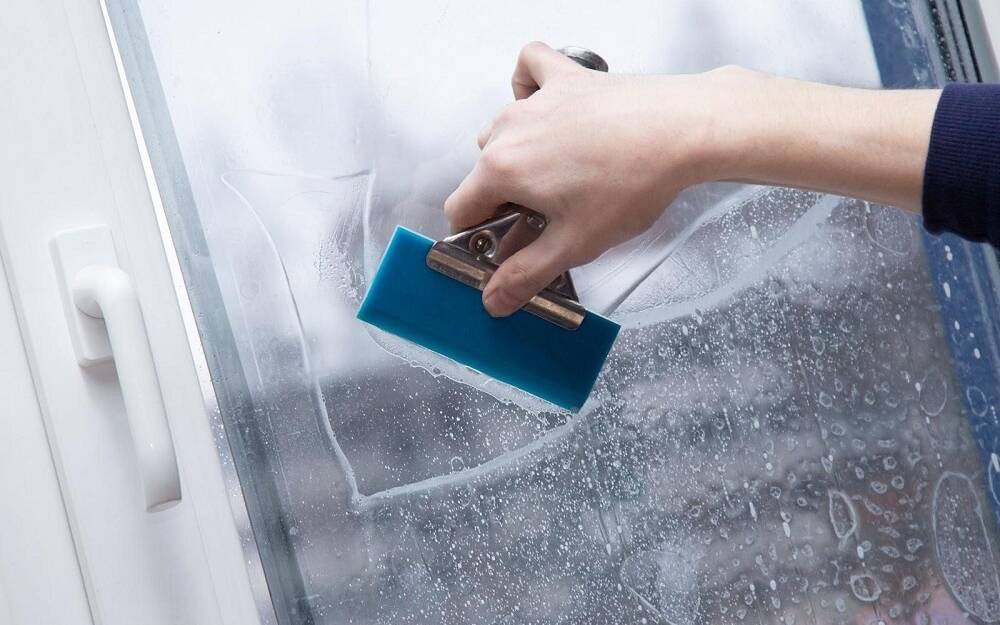
Attempting to apply window tint to dirty window glass will trap any dirt under the film. It will undoubtedly lead to a very frustrating install, so don’t be tempted to skip this step.
Start by soaking the window with a spray bottle filled with soapy water. You can then use a stainless steel scraper or a rubber squeegee to clean the window thoroughly.
While it is possible to accomplish this with a cloth or towel, those will often leave behind tiny fibres or residue that can interfere with a high-quality installation. A scraper or squeegee will eliminate this issue, making the process easier and less frustrating.
The Installation Process
Wet The Window
Once you have cleaned the window and cut the tint to the measurements you have taken, it's time to begin installing. First, you’ll need to take the water/soap solution you used to clean the window and thoroughly wet it before applying the film.
Since the window needs to be wet for proper application, try to avoid installing the tint in direct sunlight. The sunlight will cause the solution to dry faster than you can install the film.
Apply The Tint to The Window
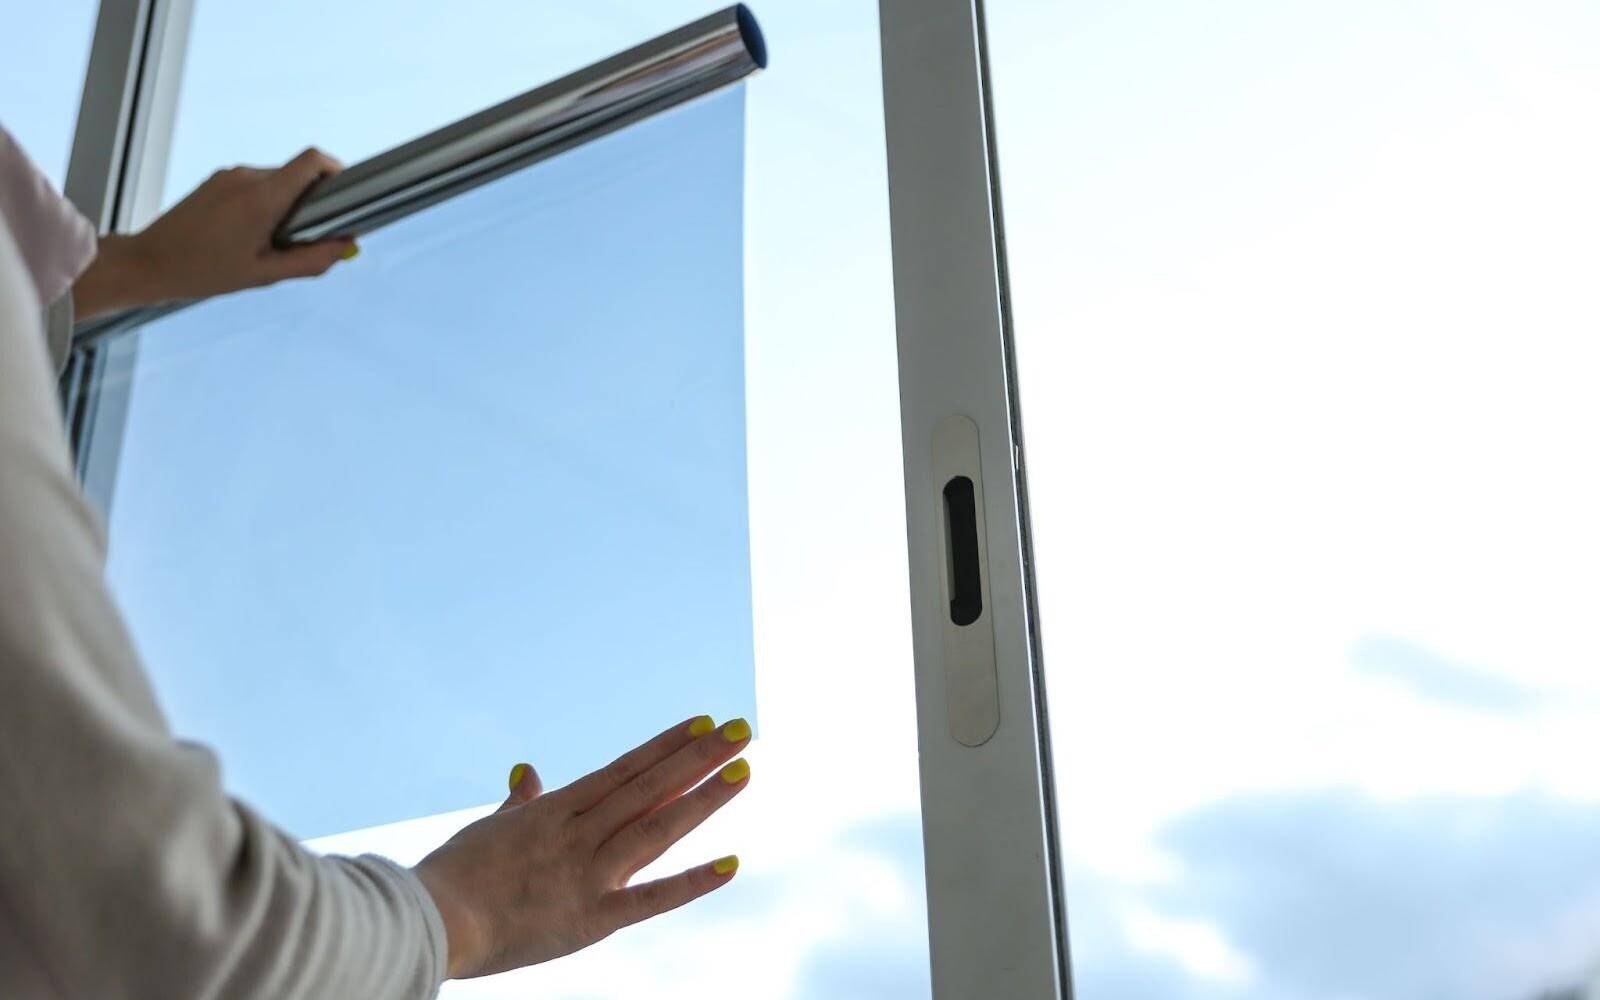
Start by removing the clear backing from the window tint. While you can remove it altogether, we recommend slowly removing it as you install the film. This way, you can help avoid complications like the tint rolling up and sticking to itself. This can make your install go sideways in a hurry.
Start from the top down, with the adhesive side facing the wet window. Align the tint with the top of the window and slowly work your way down, peeling away the backing as you go. While doing this, the film will begin sticking to the wet window. Continue until the window is covered and the tint is in place.
Don't worry if the tint is slightly out of position. With a bit of care to avoid tearing, the film can be easily adjusted thanks to the wet window, which causes it to slide freely.
Smooth Out The Film
Once the tint is in your desired position, you can begin smoothing it out, removing the excess water, air bubbles, and creases.
Using a rubber squeegee, start in the center of the window and work your way out to the edges. Some prefer to work from the top to the bottom, but we recommend starting from the center to reduce the risk of damaging the tint or having it slide out of place.
Take your time with this step to ensure that all excess solution is removed and that there are no bubbles or creases. If left alone, those bubbles and wrinkles can eventually result in cracks or discoloration.
Post Installation Finishing
Trimming The Excess Film
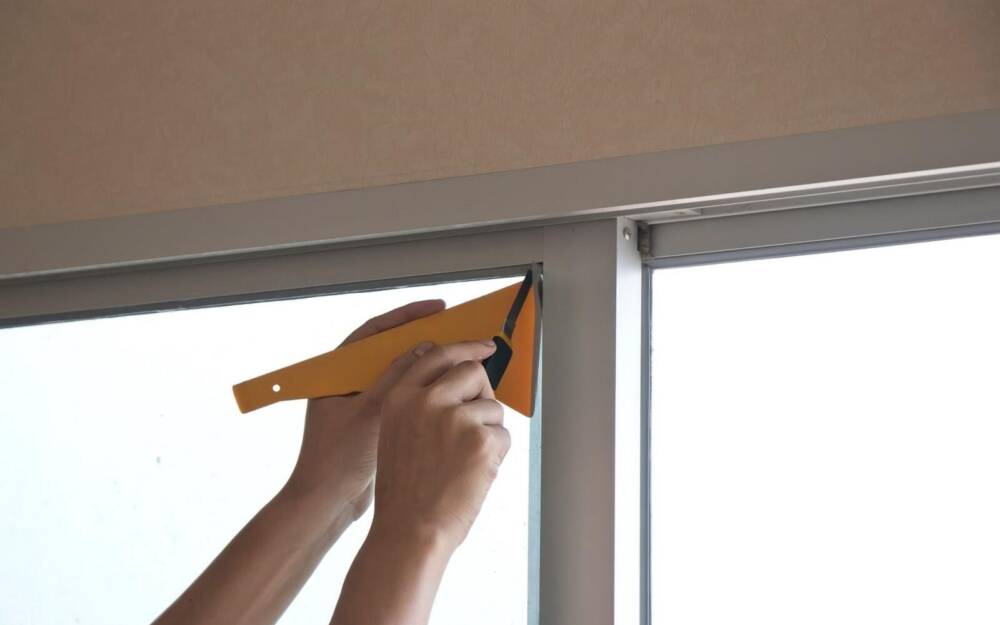
Now that your tint is in place and bubble-free, allow it to completely dry. Once it is dry, the film will no longer slide around or inadvertently move, and you can safely and efficiently trim any excess film.
With a good sharp utility knife, cut the film along the gasket of the window to remove any excess. To ensure a smooth straight cut and to avoid damage to your window frame, we recommend using your plastic squeegee as a guard, following the knife as you cut.
Cleaning The Window And The Tint
You can give it one final cleaning with the tint installed, adhered to the window, and the excess film trimmed. Spray the window with the water/soap solution and wipe it down with a soft, non-abrasive sponge. The sponge will help absorb the solution without leaving any streaks.
Once you've done that, any leftover solution can be removed with a soft rubber window squeegee, and the window frame can be wiped with a lint-free cloth or towel.
Troubleshooting Tips
If your application didn’t go as perfectly as expected, there are a few troubleshooting tips you can implement to get back to a perfect application.
Dealing With Air Bubbles
No matter how careful you are with the installation process, some bubbles may still exist. To help correct this, wet the area with your solution and carefully peel back the closest corner.
As you do this, use the squeegee to smooth out the area below the air bubble until it releases itself from the tint. Once gone, you can carefully reattach the corner that you peeled back.
Removing and Repositioning The Tint
While the glass is still wet, repositioning the tint is as simple as using both hands to slide it into the desired position. However, you need to do so carefully to avoid tearing.
You can also use this moment to remove the tint to readjust its position, if necessary. With the window still wet, use the solution to wet the film, making it easier to peel and decreasing the chances of damage.
Peel back an area of the tint or the entire piece if needed, being careful to avoid letting the film touch itself or any dry surface. You can then reinstall using the steps above.
While applying window film may seem straightforward, getting it right the first time can be difficult. If you live in the Calgary or Edmonton area, Carbon Graphics is here to do the job for you! Contact us today to get the conversation started.
Frequently Asked Questions
What tools do I need to install window film?
To install window tint, you will need a rubber window squeegee, a rubber window film squeegee, a stainless steel scraper, a sharp cutting blade, water and soap solution, a tape measure, a small plastic squeegee, and a sponge for final cleaning.
How long does it take to install window film?
The installation process depends on the size of the window you're covering and how experienced you are with installing the film. Professionals will make it look easy, but the key is not to rush things. Take your time, and the results will show. Remember, you’re probably only going to do this once, so it’s worth doing it right the first time.
Can window film be applied to any type of window?
Window film can be applied to almost any type of window. However, before applying window tint, knowing the different surfaces or coating that may already cover the window is essential to make installation easy and not void the manufacturer's warranty.
Is it necessary to have the film professionally installed?
In order to register the warranty, you must have a certified professional install the window film. Having a professional come in and take care of it properly the first time is 100% worth it.